
Now that your environment is set up, let’s create your first web project! If you missed that part, please refer to the previous session regrading environment setup.
Project Setup Steps
Step 1: Create Project Folder
Open your terminal and create a project folder:
# Navigate to where you want to store projects
# Create a projects folder (if it doesn't exist)
mkdir web-projects

# Navigate into it
cd web-projects

# Create your first project folder
mkdir my-first-website

# Navigate into the project
cd my-first-website
Step 2: Open in VS Code
# Open the current folder in VS Code
code .
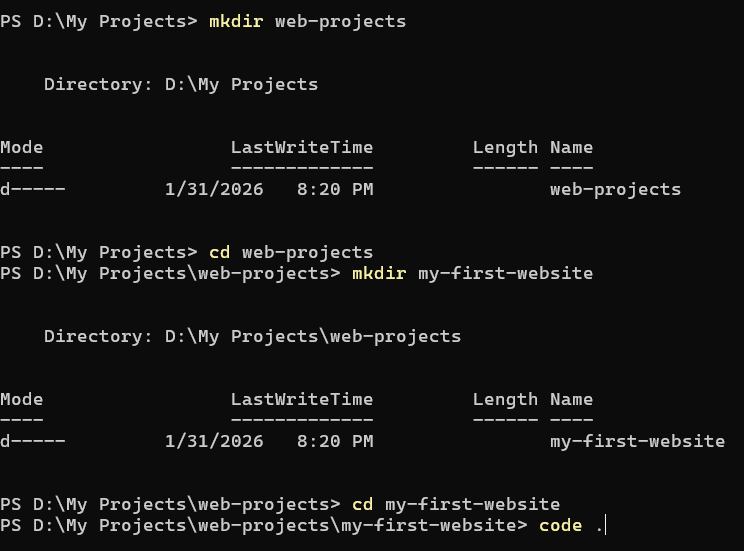
This opens VS Code with your project folder ready.
Step 3: Create Project Files
Using VS Code:
- Click the “New File” icon in the Explorer panel
- Create these files:
index.htmlstyles.cssscript.js
Your First HTML File
Open index.html and type this code:
<!DOCTYPE html>
<html lang="en">
<head>
<meta charset="UTF-8">
<meta name="viewport" content="width=device-width, initial-scale=1.0">
<title>My First Website</title>
<link rel="stylesheet" href="styles.css">
</head>
<body>
<header>
<h1>Welcome to My First Website</h1>
<nav>
<ul>
<li><a href="#about">About</a></li>
<li><a href="#projects">Projects</a></li>
<li><a href="#contact">Contact</a></li>
</ul>
</nav>
</header>
<main>
<section id="about">
<h2>About Me</h2>
<p>I'm learning web development and building amazing websites!</p>
</section>
<section id="projects">
<h2>My Projects</h2>
<p>Coming soon...</p>
</section>
<section id="contact">
<h2>Contact</h2>
<p>Email: student@university.edu</p>
</section>
</main>
<footer>
<p>© 2026 My First Website</p>
</footer>
<script src="script.js"></script>
</body>
</html>Your First CSS File
Open styles.css and add:
/* Reset and base styles */
* {
    margin: 0;
    padding: 0;
    box-sizing: border-box;
}

body {
    font-family: Arial, sans-serif;
    line-height: 1.6;
    color: #333;
}

/* Header styles */
header {
    background-color: #007bff;
    color: white;
    padding: 1rem 0;
    text-align: center;
}

header h1 {
    margin-bottom: 1rem;
}

nav ul {
    list-style: none;
    display: flex;
    justify-content: center;
    gap: 2rem;
}

nav a {
    color: white;
    text-decoration: none;
    font-weight: bold;
}

nav a:hover {
    text-decoration: underline;
}

/* Main content */
main {
    max-width: 800px;
    margin: 2rem auto;
    padding: 0 1rem;
}

section {
    margin-bottom: 2rem;
}

h2 {
    color: #007bff;
    margin-bottom: 1rem;
}

/* Footer */
footer {
    background-color: #333;
    color: white;
    text-align: center;
    padding: 1rem 0;
    margin-top: 2rem;
}
Your First JavaScript File
Open script.js and add:
// This runs when the page loads
console.log("Welcome to my first website!");

// Display a welcome message
document.addEventListener('DOMContentLoaded', function() {
    console.log("Page is fully loaded and ready!");

    // You can add interactive features here later
});
Step 4: View Your Website
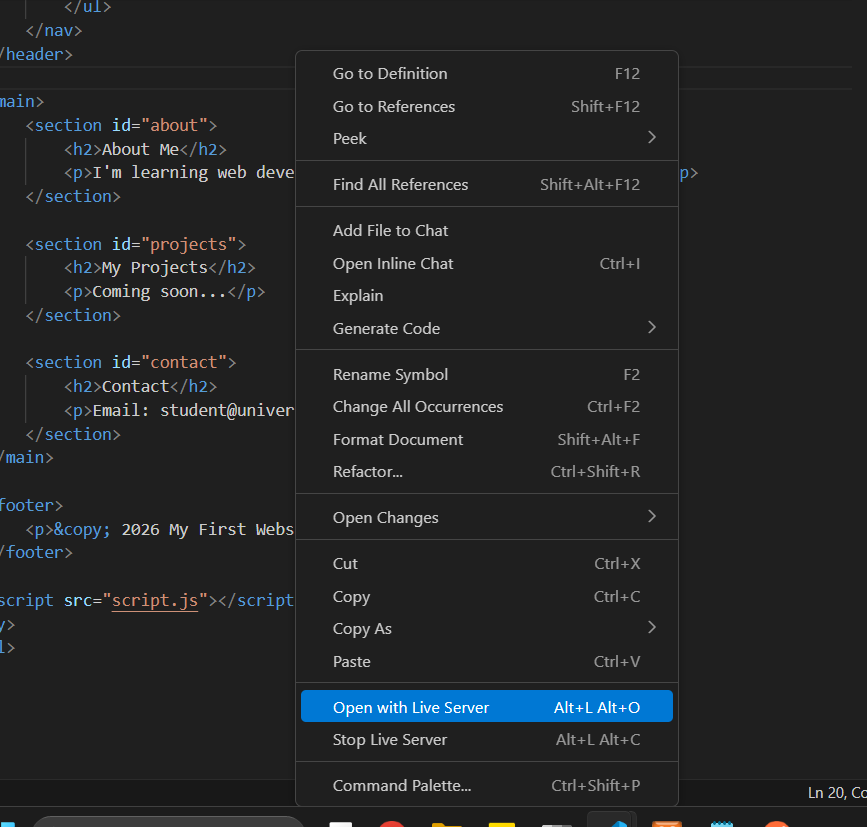
Method 1: Using Live Server (Recommended)
- Right-click on
index.htmlin VS Code - Select “Open with Live Server” (Need to use Live Server extension in vscode)
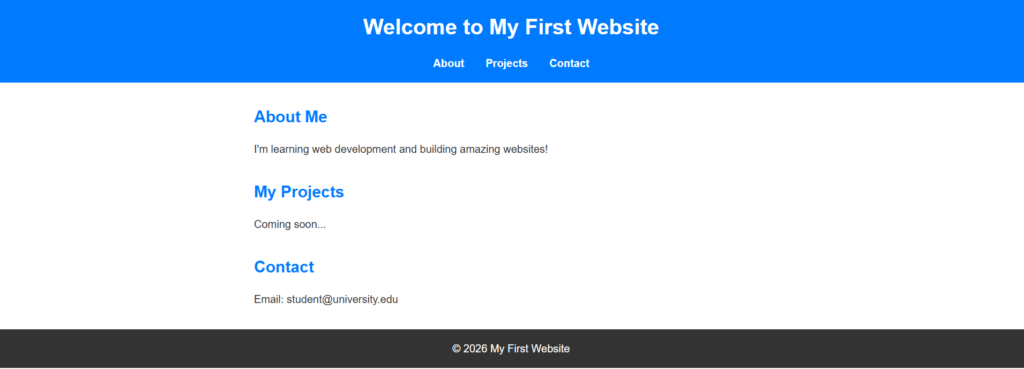
- Your website opens in the browser
- Any changes you make will auto-reload!
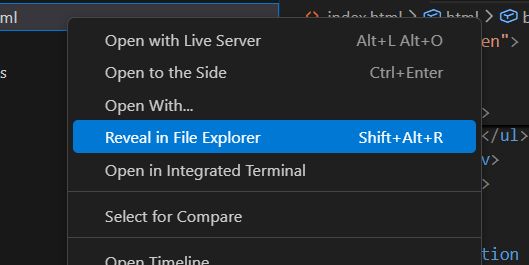
Method 2: Direct File Opening
- In VS Code, right-click
index.html - Select “Reveal in File Explorer” (Windows) or “Reveal in Finder” (macOS)
- Double-click
index.htmlto open in your default browser
Step 5: Inspect Your Work
- Open Chrome DevTools (F12)
- Click on the Elements tab
- Hover over different elements to see them highlighted
- Try changing some CSS in the Styles pane
- Open the Console tab and see your JavaScript message
Congratulations! You’ve created your first website!
Project Organization Best Practices
As you build more projects, good organization becomes crucial:
Recommended Folder Structure
my-project/
├── index.html
├── about.html
├── contact.html
├── css/
│ ├── styles.css
│ └── responsive.css
├── js/
│ ├── script.js
│ └── utils.js
├── images/
│ ├── logo.png
│ └── hero.jpg
├── fonts/
│ └── custom-font.woff2
└── README.md
Benefits:
- Easy to find files
- Scalable as the project grows
- Standard structure recognizable to other developers
- Clean and professional
File Naming Conventions
Do:
- Use lowercase:
index.html,styles.css - Use hyphens for spaces:
about-us.html,main-styles.css - Be descriptive:
contact-form.js, notform.js - Use consistent naming patterns
Don’t:
- Use spaces:
my file.html(causes issues) - Use special characters:
contact!.html - Mix cases randomly:
AboutUs.html
Practice Exercises
Reinforce your learning with these exercises:
Exercise 1: Customize Your Site
- Change the colors in
styles.css - Add a new section to
index.html - Modify the navigation links
- Add your own content
Exercise 2: DevTools Exploration
- Add a border to an element
- Open your website in Chrome
- Open DevTools (F12)
- Change the background color using Elements panel
- Modify the heading text
Exercise 3: Terminal Practice
Create this folder structure using only terminal commands:
practice/
├── project-1/
│   ├── index.html
│   └── style.css
└── project-2/
    ├── index.html
    └── style.css
Exercise 4: Multi-Page Site
- Create a new HTML file called
about.html - Copy the structure from
index.html - Change the content
- Link to it from your navigation
Essential Resources
VS Code Documentation:
Chrome DevTools:
Terminal Learning:
What’s Next?
Now that your development environment is configured, you’re ready to dive deep into HTML and learn how to structure web content properly.
Next Lesson: HTML Essentials – Master document structure, semantic elements, forms, and HTML best practices